Rebuilding old Bachmann U36B Part 6 Brass Handrails
making new handrails from brass wire
We're at the point where we need some handrails for our U36B project and they way we're going to do this is with brass wire and solder. We'll be using K&S wire #8159 .020in from Hobby Lobby at $1.49. 4 Pieces will be just enough to do this without wasting the wire.
In the old days, I used to do this out of piano wire which is even cheaper, but much harder to bend. I don't know how I ever had the patience to bend that stuff, but it can be done. Piano wire is pretty tough to solder also.
We aren't going to do a lot of measuring to make these handrails. Remember that our goal here is to finish a model good enough to go on the "C" list.
The A list is all your rock star scratchbuilt super detailed contest winning most excellent pieces. The B list is your customized factory super detailed $300 locomotives that you don't feel comfortable about throwing into a tub of pine oil.
Then there is the C list. These are your supporting cast members, the extras, that 3rd or 4th locomotive in the consist during a photo shoot. It's one of the workhorses in an operating session.
Being a workhorse means having handrails that are more durable than the latest slippery plastic scale handrails. Those handrails don't take a lot of abuse and seem to always be wavy somewhere...
First let's measure up a bit, here's a pic of a prototype that will guide us in the employment of our Mark I eyeball....

This photo shows us that the handrail should cross by the rear grill and the top of the rail in front should be lined up nicely with the words on the front. Using the ruler, that means a rough hieght of .5 inches above the deck, but we're still going to do this be eyeball and stay away from the ruler as much as we can.
Once we make a rail, then we can line it up on the cutting board and copy it using the ruler lines on the board which is much easier.
First we need to drill some holes for the stanchions. I'm going to use a drill bit that by eyeball looks real close to the size. I could have gone to the Hobby Store and got a matching drill and wire set, but we should really try to use what we have on hand. The dental pick is used to make a mark where to drill. That's really important to prevent the drillbit from breaking. I could have also used the drill press or dremel, but the pin vise is almost as fast with no danger of melting like a dremel.

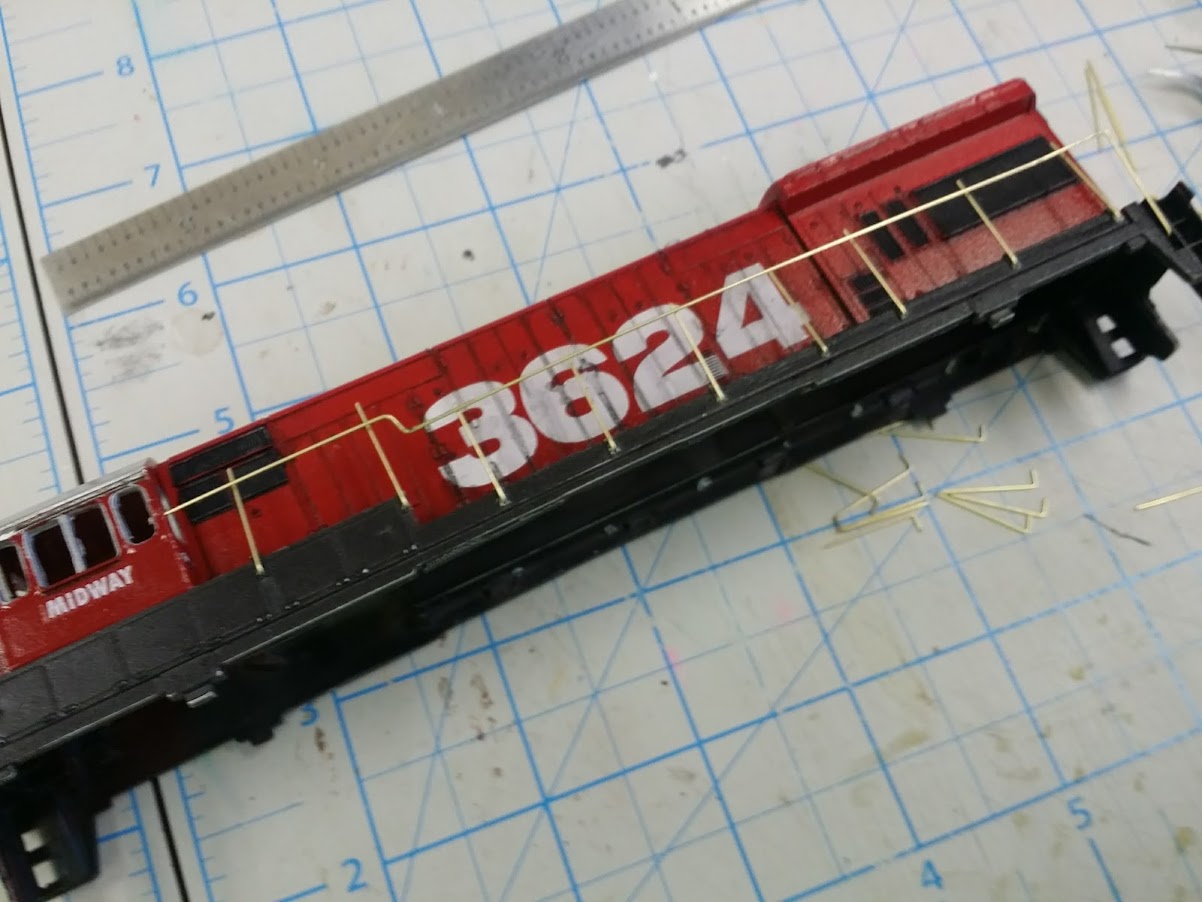
Now we need to drill 28 holes and check to see that the wire fits....it does:

Using the prototype picture and an alcohol marker and steel ruler ($4 on ebay) I determined the .75 inch stanchions were more that long enough. We need them to be just a bit long so we can shape them later.


When all are bent it should look like this:


No comments:
Post a Comment