Tuesday, February 28, 2017

Rebuilding old Bachmann U36B Part 5 Weathering

Rebuilding old Bachmann U36B Part 5 Weathering

1 color panel line pin washing


If you haven't figured out by now, my trains are inspired by the Minnesota Commercial Railroad, so my weathering is based on photos I took of the real deal....

The effect I'm going for in this build is sort of like this B30-7 I found in St. Paul...

my gallery of Minnesota Commercial can be found here:


Here is where we are with our build:


I used Testor's Gloss black and mineral spirits to just dab at the panel lines and let the paint flow where it will.  Then I used either my finger, a cutetip or a paper towel to wipe off the excess.

I'd say for this low detail build we are looking pretty good and can now go ahead and spray a gloss sealer on it.  Then we can move on to the handrails.

For a detailed look at how the real pros do this, here is my favorite panel line pin wash video:


This guy knows how to do it.  He uses a pretty expensive pin wash, where I use just plain Testor's.

Rebuilding old Bachmann U36B Part 4 Decals

Rebuilding old Bachmann U36B Part 4 Decals

Modern Decals for the Vision Impaired Modeler


Each month I participate in an operating group that really gets quite sophisticated.  Not having the best vision is a problem.  So you wear glasses on your nose or bifocals.  Comparing your switch list to cars on the track at around 3 feet away gets to be a problem.  Better yet is when you think your car is in the middle of a train that's in the middle of a yard and you want to look between cars to spot a number.

Years ago I decided I wanted to do the opposite of what most railroads do.  I'd have a big number and a small logo.  The problem was making decals for big numbers.  And the most pressing problem, making them white.

I used to do a lot of commercial photo printing and have 2 large format high resolution photo printers.  I was convinced that I could learn to print the best decals that could be made.  You can go back to June 2016 to read my series on making decals.  Since then, I've gotten my ALPS MD-1000 working great for white decals.

No printed decals can match the strength of white decal paper.  They just can't, so when it comes to large white decals the best way to go is the Cricut.  My Cricut Explore is what I use to make exactly the numbers that I want when I want them.  I don't need to assemble my numbers from a sheet of general numbers.  I just cut them.


Once they're cut I can apply them.  What I use is 1 drop ammonia and then a jar cap about 2 inches across and half inch deep.

Large decals can be hard to work with.  A Cricut spatula works for the big decals and I use an xacto 17 flat blade for small decals.  Use quite a bit of water and place the decals.

Position them all...plenty of water, if you screw up, put it back in the water...
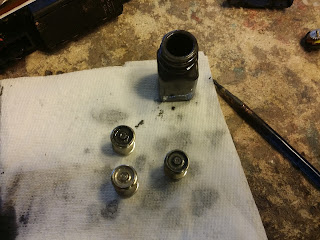
Now let them dry out pretty good BEFORE you use Solvaset.


Now a little solvaset at a time, big decals tend to wrinkle up, so little by little...


While we're waiting, let's do some number boards in Freehand....

30 years ago, I painted the number board position white, cut individual numbers, 4 sets of them, and placed them on the white and then put a clear decal with black border over the top.  Yes, they looked good and still do, but that's too much work considering I can do this:
 I used my machinist's ruler to measure the number boards then typed the data into Freehand.  A sheet of Epson Premium Glossy photo paper and I get this:
These numbers will look awesome for something like 300 years according to Epson...

White glue is the appropriate glue to attach photo paper to plastic.  It will dry clear which renders mistakes invisible.


Now that looks pretty good if you ask me.


Rebuilding old Bachmann U36B Part 3 The Body

Rebuilding old Bachmann U36B Part 3 The Body

Getting ready to rebuild the body


Now that the motor and frame are working, we can turn our attention to the body.  If you remember the photo of the original, this is what we were working with:

Yes, that is dried pottery clay that was used for weathering.  In addition to being actually weathered and beaten up thoroughly, this locomotive was in rough shape.  But, as a testament to it's actual toughness, it's really starting to turn into something extra special...

First thing I did with this shell was put it in the icky box, as we call the 5 gallon tub of 8.7% pine oil.  If you plan to make your own icky box, make sure it has a decent lid and then throw a bath towel over it to keep the smell of pine contained to the box.  I generally have a number a future projects in the box for long periods of time.

Since there have been so many beginners shut down on various forums recently, I decided to pull this project out and do this tutorial.  Like I said before, this is a great place to learn and many of you have these locomotives from your very first train set.  So let's get that paint off:


You can see that I removed the handrails, actually just broke them off.  They were in bad shape and I said we'd make our own handrails anyways.

I'm going to install a homemade anti-climber.  It's not going to look prototype in any way, but it won't stand out that much and it will give a lot of structural strength to the front end.  I'm going to use some plastruct channel that cost about a $1 for enough to do around 10 locomotives.

Another thing that I can't say enough is that you must use the correct glue.  When joining plastics, especially different kinds to each other there are 2 choices.  Super Glue or Epoxy.  Do not use Testor's Orange Tube glue to join different kinds of plastic, it doesn't work - that glue is for joining the same plastics to each other.

So I sanded the pilot flat using my combination belt and disk sander from Harbor Freight and filed the L channels just a bit and joined them with a bit of super glue.  If I needed more working time, epoxy would have been the way to go.


Don't worry about measuring them....


Now I can insert my short rant about tools from Harbor Freight.  A lot of them get terrible reviews because a guy spends $50 on a tool and tries to mill hardened steel or aluminum and it fails.  I have several machines from there and I use them on model trains which generally are plastics that sand, drill and shape nicely.....

So using the disc sander I just shaped the anti-climber using my Mark I eyeball.


I'm not doing any putty work or filling anything.  I'm also not doing wire grab irons or other details.  This is supposed to be an easy build, not a super detail build.  Next I did a super light coat of fast drying white primer and put the heat lamp on it.  In 15 minutes it was ready to start painting.


I spray painted the cab just because that red takes a while to bake and dry.  I airbrushed the satin black section with some acrylic paint I got at walmart for $3.  That little can will last a couple years.  I cut the acrylic with about 2/3 91% alcohol and I spray at 100psi.  Some guys paint at 10psi, others at 25, but I paint at 100psi because I can.  That doesn't mean you should.


While the cab is baking, and after about 45 minutes of drying time on the black, I got started on the masking.
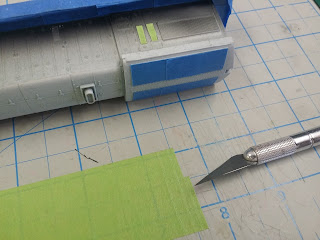
This is a super simple paint scheme, just red and black.  The trick to masking is to put on a TV show that you can binge watch while cutting small strips of tape and masking your project.  You don't need to measure, just cut small pieces and start applying the tape.  In a short time, everything is masked.


Check this out:  just some small random sized strips stuck everywhere I wanted to avoid paint.  I didn't really measure, but I did use my steel ruler to cut some straight lines to save tape.  I use tape from the auto parts store because it does a much better job.  There is a green and an orange tape for detail work that does very well.  There are 2 kinds of blue tape and one of them is super thin and doesn't stick very well.  Beware large sections of green or orange tape because it can pull the paint off from underneath it.


Now let's paint some Rustoleum Sunburst Red from a can that was about $6.  I cut it with 2/3 lacquer thinner and again do 100psi.  Lacquer thinner is one of the best secrets to learn in airbrushing.

The cab gets a silver roof and then to bake it under a heat lamp for a few hours.  This red I'll also leave overnight just to make sure.


The next day, the tape comes off and we can do a little flat black work on the grills:


And we can start doing a bit of my favorite 1 color weathering, which I'll go into detail later....


Saturday, February 25, 2017

Rebuilding old Bachmann U36B Part 2 Pancake Motor

Rebuilding old Bachmann U36B Part 2 Pancake Motor

Putting it back together


Let's finish up those wheels.... so cut the old traction tires off.  I'm assuming you found traction tires on ebay and got a bag full, or you got some bullfrog snot.  I'm not going to talk about bullfrog snot in this rebuild, but somewhere down the line we'll get to it.  A word of warning - bullfrog snot is expensive and if it gets cold at all it is forever ruined.  I spent about $30 for a tiny jar and it came already ruined and there is absolutely no returns.  I'd like to get some to use on strange wheel sizes for old steam engines, but it's super expensive to risk ordering it.

Putting on the new tires is really easy.  Once they're on, just run a small screw driver around the inside of them to make sure they're all flattened out.


But WAIT!!! I was going to do just a bit of weathering...sort of.


I put some of this liquid graphite into a small testors bottle and use it to paint the wheels so they look just a bit more real....it dries pretty fast and looks decent....


I'll polish the surfaces again when dry and then put the traction tires on...


OK, more wheels later.... for now let's take a look at those electrical connections.... 1 of them broke...


A little rosin flux and some solder and then a hit with the polishing wheel and we are back....


Let's start getting that motor back together...


Here it is cleaned and ready above and here below is where I skip a couple steps and put it back together...the mystery is in the gears - all the little gears are on the inside if you a looking at it this way:


Look how clean those gears are.  Here they are from the top:


OK traction tires on and wheelsets back in:


HERE COMES THE PART WHERE WE DECIDE WHAT TYPE OF LUBRICANT GOES ON THESE GEARS...I use this bearing grease which is lithium, this one can has lasted me years and it looks like I've hardly used any.  I've never had a problem with it, none of my gears have been attacked by it and it doesn't spread like oil does.  One note is that is does take a bit of warming up sometimes if it's cold.  You barely need any.


A tiny screwdriver lets me apply it:


And we got a spot on one wheel to clean, but otherwise everything looks good.

Now is the time to get real careful - we're going to put the brushes and springs back.  If you drop a brush or spring, it will be gone forever, you'll never find it unless you no longer need it.  So be extra careful here.


Put the brushes in and then do 1 spring at a time.

See this spring?  If you drop it, it's gone.  It is possible to buy springs this small from certain manufacturers like Templeman  Co., but they still have to be trimmed, so let's try not to lose it:


Gently place the spring in its collar:


Now carefully position the frame and connect the lead:


How do you know if you have connected the correct lead to the correct post?

Here is the rule:
When a locomotive is on the track and you give it some power, the locomotive should move forward with the right hand side (aka engineer's side) on the right hand rail.

In other words, if your direction arrow is pointing right, your locomotive is facing right, then it moves right when you give it some power.

If your locomotive goes backwards, switch the 2 wires around.  It can be more complicated, but don't make it more complicated.

Check out how that graphite paint worked, not bad and most important - easy to do.


An now a word about the sideframes...

I don't like these sideframes at all.  These are really old and look terrible.  Bachmann came out with much better sideframes later and the good news is that they fit.  I do have some nicer ones, but what I'm hoping to get is the sideframes from the B23-7.  I've tested them on these locomotives and they fit.  The FB-2 sideframes are a big improvement, prototype or not, I like those FB-2 frames from the B23-7 for such a cheap rebuild.  As of February 2017, the Bachmann parts catalog has some old Blomberg sideframes that are much nicer looking for under $5, but they will likely be gone in the near future.

Let's get it back together and test it.  Since I know it's going to work, I'm going to put on some Bachmann E-Z Mate Over Shank couplers and guess (correctly) that they will line up with the height guage:


As you can see, I used the couple pocket and screw but added a tiny washer.  If you don't have a tiny washer, make a simple plate with a hole in it to keep the coupler in place.  Something that works is any thin plastic.  You know how lots of things come in clear plastic blister packs?  That stuff you use to make cheap windows for your buildings?  Yes, that stuff will work.

Now lets check the height:


OK, the plastic frame is bent and the coupler is low.  A bend with a pliers takes care of that problem.  But what should you do if you don't have any over shank couplers?  You can cut the coupler pockets off and mount them to the body instead.  We'll do that to a TYCO locomotive do the road a bit.... now let's check again:


And the other side:


Time for the test track.....

In the next part we'll start looking at the body....